Spooky And Fun Pumpkin Carving Ideas
Here are some fun pumpkin carving ideas. Now you can get started on your own
masterpieces.
Firstly, you will need pumpkins and some carving tools. Usually these tools are already in your house somewhere. For example an ice-cream scoop or spade. Several different types and sizes of knives will also be necessary. You could also use a wood chisel and a small hammer or a household drill (for adults only of course).
When children are doing the carving, please ensure that an adult is supervising. Leave plenty of space between people which can help
prevent accidents. If younger kids are involved and carving with sharp knives is out of the question, then it could be an idea to let the kids mark the pumpkins and have an older child or parent do the carving. This way they feel that it is still their design and they came up with their own pumpkin carving ideas.
Another option is to use
colored paints and just let them paint the pumpkin. This way you can create all kinds of pumpkin carving ideas without actually carving.
 Next, selection of the pumpkin is important. Choose one that is ripe and without bruises or cuts and nicks.
Do not carry a pumpkin by its stem as it may break and bruise from the fall. Once a pumpkin is bruised it will not last very long.
Also choose the correct shape for what design you have in mind. Some pumpkins are wide and flat and others are long and tall and everything in between also exists.
Before we get starting on pumpkin carving ideas, here is how to set up your pumpkin carving idea workstation...
- Place several layers of newspaper below the pumpkin to make cleaning up easy and more importantly to not damage the surface of the table or desk you are working on.
- Cut the top or bottom off and make sure the hole is large enough to reach in and pull out the seeds and stringy membranes.
- Use a soup ladle or ice-cream scoop to remove all the mush.
- The carving thickness should be about one inch or else it becomes too difficult. If you are cutting the top off and want to replace it after completing (this is normally the case), be sure to angle the cut so that the top will stay on after you replace it.
- When carving always try to keep the blade perpendicular to the skin. This makes for the most efficient carving and does require less effort.
You are now ready to start carving!
Pumpkin Carving Ideas Part 1...
Use a marker pen to outline your design on the pumpkin surface. Alternatively, if you find a pumpkin carving template online and print it out, you could tape the paper to the pumpkin surface and make markings using a nail or knife end.
Once complete, remove the paper and begin carving. If you are having difficulty attaching the paper to the pumpkin, wetting it slightly may help.
While carving, do not bend or twist the knife. If you want a sharp corner, remove the knife and reinsert it at a different angle. When ready to remove a piece, always push from the inside outwards. If the piece is too large for pushing through, break it up into smaller pieces to make it easier on yourself.
Usually a face is carved into the pumpkin consisting of 2 eyes, a nose and a mouth. If you have a large enough pumpkin, you could carve several faces into it.
Once your carving masterpiece is complete, you need to put in a light source. This could be a tea light candle, a regular candle or a colored glow stick or even a battery powered light. Use your imagination and you'll come up with all kinds of pumpkin carving ideas.
Pumpkin Carving Ideas Part 2...
If you want colored light and don't have glow sticks, you can use colored cellophane paper on the inside of the pumpkin. Ensure that it is taped securely behind the eyes, nose and mouth to prevent it catching fire.
You can come up with all kinds of pumpkin carving ideas with glow sticks.
Glow sticks or battery powered lights are recommended for younger kids to prevent any accidents involving fire.
Another thing to watch out for when using an open flame is the pumpkin caving in due to being slowly cooked from the inside. This is because hot air rises and gets trapped at the top of the pumpkin. Eventually it cooks and gets soft and caves in! To prevent this, create a vent hole directly above the open flame so that the hot air escapes. Also ensure that the hot air rising cannot ignite something else like hanging decorations or a plant.
Pumpkin Carving Ideas Part 2...
How do you make your pumpkins last longer?

The best way is to restrict the amount of time the pumpkin is lit with a candle. The candle cooks the pumpkin from the inside slowly but surely. When not displaying your Jack O'Lantern, keep it in the refrigerator or a cool place.
Here are some really crazy
pumpkin carving ideas
to consider...

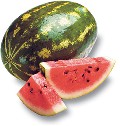
Sometimes pumpkins can be very tough to carve. Ever consider using a watermelon instead? The watermelon is very easy to prepare and carve. To make it more pumpkin like, you could paint the outside orange. Did you know that you can save the pumpkin seeds that have been removed for roasting? Make sure they are not washed as this will remove the natural flavour.
You could also make pumpkin pies with used Jack O'Lanterns but don't wait too long or it will start to go bad.
Related Articles:
www.Craft-Ideas-Guide.com
© 2004-2006 www.Craft-Ideas-Guide.com


 Next, selection of the pumpkin is important. Choose one that is ripe and without bruises or cuts and nicks.